Detecting Image Duplicates at OLX Scale

Duplicated content creates many issues in online platforms, and this is especially true for online classifieds, where duplicates require special attention.
This is a second post of the duplicate detection series. Previously, we described the problems with duplicated content and suggested to use a content moderation for solving them. We also outlined a generic approach for candidate detection: the two-step framework.
In this post, we’ll talk about implementation details and we’ll focus on images. Building a system that can deal with processing millions of images daily is one of the most difficult parts of building a duplicate detection system, that’s why we cover this part in detail.
In particular, this post talks about:
- Why images are important for detecting duplicates and how they can be used;
- Perceptual image hashes and how to use them for duplicate detection;
- Implementing a system for detecting image duplicates with AWS and Elasticsearch.
Like in the previous post, we talk about a generic approach to duplicate detection, and the system described here doesn’t necessarily 100% reflect what we use at OLX. We do this on purpose, so this material cannot be used for bypassing our moderation system and harming our users. On the other hand, the post gives enough information to build your own duplicate detection system.
A Picture is Worth a Thousand Words
Before we start, let’s quickly go over the main idea from the previous post: the two-step framework for duplicate detection.
The framework consists of two steps: candidate selection step and candidate scoring step.

- Candidate selection step. At this step, we find candidate duplicates: listings that are likely to be duplicates. For that we use domain knowledge and look at listings published in the same category, from the same city; and listings published by the same author, from the same IP or the same device.
- Candidate scoring step. At this step, we use machine learning for scoring the candidates from the previous step to get the actual duplicates. We covered simple features that we can use: the basic features like the difference in price, geographical distance and whether two listings are published from the same IP; and more complex features that involve calculating text similarity between the two titles or the two descriptions.
With these basic features and text similarities, we can build a model that does quite well for the second step.
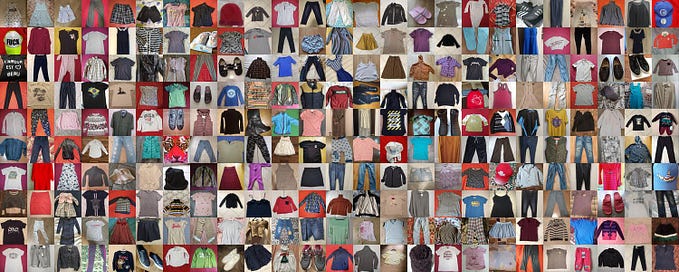
However, we didn’t talk about one particular type of content: images. In online classifieds, this is one of the most important aspects of a listing, which is why we need to use them in the duplicate detection model. We’ll see how to do it in the next section.
Image Hashes
Images play an important role in online classifieds, so we need to extract the information we have there in order to have a good model. One of the possible ways of doing it is by using image hashes: we extract hashes from images and use them for determining how similar two images are.
There are two types of hashes for images: cryptographic and perceptual.
The cryptographic hashes, like MD5, are general-purpose hashes: they work for all files, not just images. They are typically used for detecting if a file was manipulated with or not, so hashes like MD5 are used as a checksum. Even the smallest modification in the file — for example, a one-bit change — results in a completely different hash.
For example, we can take an image of a car and compute its MD5 hash:

If we modify it slightly by adding a small white rectangle at the corner, we’ll have a completely different MD5 hash:

Using MD5 hashes for duplicate detection is possible, and quite beneficial, but as we see, it only tells us if two ads have exactly the same byte-by-byte images — and nothing more.
Perceptual hashes are different: they are designed specifically for images. When an image is modified slightly, the hash shouldn’t change significantly, and often it won’t change at all. There are a few such hashes: ahash, dhash, phash, and whash. You can read more about these hashes here.
If we take the same images as previously and calculate the dhashes for them, they’ll be the same for both images:

In this particular case, dhash isn’t sensitive to adding a small white rectangle in the corner, so the resulting hash doesn’t change.
There are other modifications that shouldn’t affect the hash:
- Resize of the image;
- Saving in a different format, e.g. JPEG with a different compression level or WEBP;
- Small modifications of the image, e.g. adding invisible noise, or a small watermark.
Unfortunately, there are some modifications that break these simple hashes. For example, cropping a part of the image, rotating the image, or reflecting it does affect the hash. For catching such modifications other methods, like neural networks, should be used.
Perceptual Hashes: dhash
The basic perceptual hashes are quite simple to implement. Let’s take a look at how to compute dhash.
Suppose we want to compute a 64-bit hash. For that, we first need to resize the image to the size of 8x9 pixels. What it effectively does is dividing the image into 8x9 blocks and calculating the average pixel value in the block:
Next, we take each column of this array and subtract it from the column next to it. That is, we calculate the difference between the 2nd column and the 1st, the 3rd and 2nd, 4th and 3rd and so on. After doing that, we have an 8x8 array with differences:
Now we look only at the sign of the difference: for each value, if it’s positive, we replace it with TRUE, and if it’s negative, we replace it with FALSE. This way we get an 8x8 array with boolean values:
Finally, we convert it into ones and zeros and treat each row of the array as an 8-bit integer. The first row is “10010100”, which is 148 when converted from binary to decimal, or “94” in hex.
We repeat it for each row, and this way, we get eight 8-bit numbers in hex. Finally, we put all the hexes together to get the final hash: in this case, it’s “94088af86c038327”.
It’s a heuristic, but it’s quite simple and efficient to compute. Other hashes, like phash, work similarly, but phash first applies the Fourier transformation to the image, and whash uses wavelets.
Hash-Based Similarity
When we have hashes, we can use them for comparing the images of two listings. To check how different two hashes are, we can calculate the number of positions where the bits of the hashes don’t match. This is called “hamming distance” — the number of different bits in two binary arrays. We can compute the Hamming distances between all the images and this will give us a set of good features to a machine learning model.
For example, suppose we have two hashes, “94088af86c038327” and “94088af86c038328”. These hashes are different only in the last character: it’s “7” for the first hash and “8” for the second.
The hamming distance between these hashes is 4 bits: when we compare the binary representation of the hashes, only 4 bits are different:
This is a very useful feature for the machine learning model, but hashes are also quite useful for the first step: the candidate selection step. If two things have the same or similar image, they are excellent duplicate candidates and we definitely need to include such listings to the candidate set.
In the next section, we will see how to implement it.
Implementation
Let’s consider one part of the duplicate detection system: the part that computes hashes for all the images and, given an image, lets us find all other ads that contain this image. It’s quite a complex part of the flow, that’s why we cover it in detail. We call it “image index”.
Image index
The image index is a system that indexes hashes of images. It’s a web service that can answer the following questions:
- Given the image, what are the other images that have the same hash?
- What are the images that have a similar hash?
There are many possible options to choose from when deciding for the storage layer of this system: traditional RDBs like MySQL or PostgreSQL, key-value storages like Redis or DynamoDB, or full-text search engines like Elasticsearch.
We believe that for this system Elasticsearch is the best option. Elasticsearch uses Lucene, which is an implementation of inverted index — a special data structure often used for search.
In direct index, we provide an ID of a document and get back the content of this document. For example, retrieving the stored hash of an image by its ID is a lookup in direct index: we give the ID and get back the hash.
The inverted index does the opposite: given the hash, we can find all the images that have this hash.
This is exactly what we need for our system! In addition, on top of being able to find images by exact hash match, Elasticsearch also allows finding images with similar hash.
To calculate the hashes and ingest them into Elasticsearch, we can use a simple pipeline:
First, an image is uploaded to our internal image hosting. The hosting uses AWS S3 as the storage: all the images are stored there. In S3 it’s possible to subscribe to all the upload events: every time a file is put to the S3 bucket, it can create an event and send it to a specified queue.
We can simply listen to such events by consuming from this queue.
AWS Lambda is a great option for processing the events from the queue. The lambda gets the newly uploaded image from the bucket and computes all the hashes: MD5 and all the perceptual hashes.
After that, the hashes go to another queue, and, eventually, to Elasticsearch:
The reason we need to use two queues instead of one is to make sure we don’t overload Elasticsearch with inserts when there are sudden spikes in traffic. By adding another queue in the pipeline, we can control the pace of ingesting data and make sure we don’t kill our database with writes.
Using AWS Lambda for calculating hashes is a great option with many advantages: it takes care of scaling up and down automatically — with no involvement from the engineering team at all.
This way we can process up to 10 million images per day, which peaks at 230 images per second.
The Whole Flow
In the previous post, we covered the content moderation system and described some of its components, including the duplicate detection system.
With Image Index, the entire moderation flow may look this way:
- First, a seller creates a listing; all images are uploaded to S3;
- The images go through the Image Index pipeline, we calculate hashes and put them to Elasticsearch;
- When the listing reaches the automatic moderation system, we already have all the hashes computed and stored in Image Index;
- The automatic moderation system via the duplicate detection component talks to Image Index (and other components) to get duplicate candidates and scores them;
- The system makes a decision to accept or reject the listing, and in cases when the system is not sure, the listing goes to manual moderation;
- The moderators make the final decision and the decision is stored in logs — to be able to feed it back into the system for improving the quality of predictions in the future.
Summary
- The easiest way to incorporate the information from images to the model is by using hashes. The hamming distance between two perceptual hashes tells us how different two images are.
- Image hashes can also be useful at the candidate selection step: if two listings share the same image, they are quite likely to be duplicates.
- We can use Elasticsearch to build a system for quickly finding images with the same hash: Elasticsearch uses inverted index, which is quite suitable for this type of query.
- To build the hash calculation and ingestion pipeline, we can listen to S3 events. This way, every time an image is put to S3, we immediately calculate its hashes and put them to our storage.
- AWS Lambda is a great platform for deploying the hash calculation component: it scales up and down with no involvement from the development team.
- We should save the decisions made by moderators to feedback into the system in order to improve its performance in the future.
We hope you find this article useful and can now apply the knowledge to get started on building your own duplicate detection system.
This post is based on the materials from the talk “Fighting fraud: finding duplicates at scale”, presented at PyData Berlin 2019 and Highload++ 2019 in Moscow (slides).
If you liked the story, please help to spread the word about it.